Browse & search docs
Host a server
Starting a new project? LoreGUI can provision and serve a repository for you — no command line, no hand-written config. On first launch, choose Set Up / Host a Server on the Choose Your Setup Mode screen.
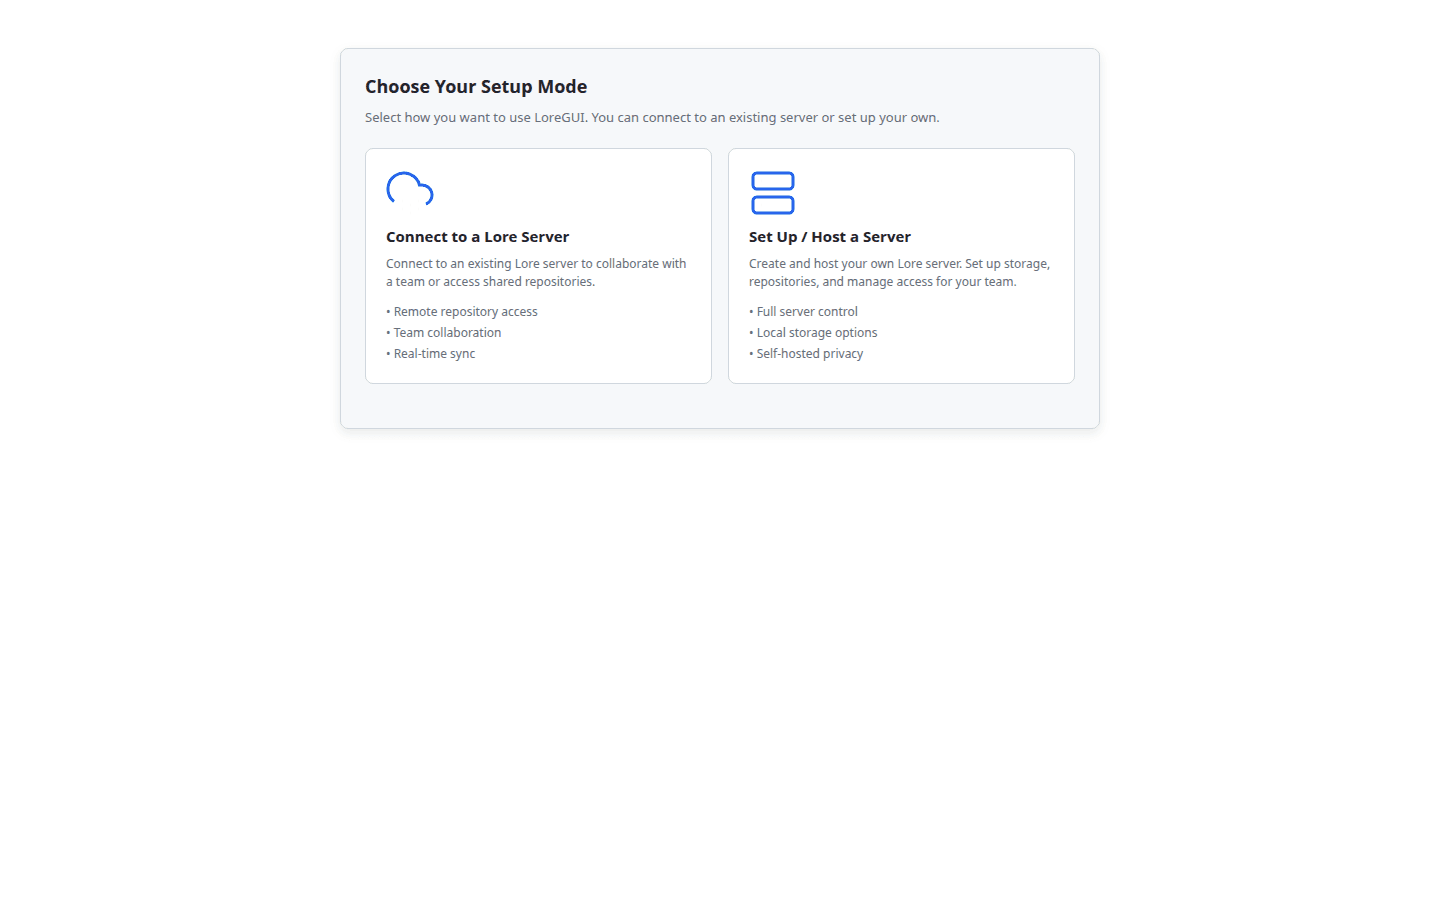
The host setup flow
The guided host flow walks four steps:
- Pick a storage backend — local disk, or an S3-compatible bucket (S3 / MinIO / Garage).
- Validate connectivity — LoreGUI runs a real round-trip against the backend so you find problems before any data lands.
- Initialise the store — it creates a shared store and then your first repository inside it. (A shared store is created before repositories, because repositories read fragments from it.)
- Host the server — LoreGUI starts a real
loreserverover your store and hands you thelore://URL to share. This is where the configuration surface below lives.
The server store selected in this flow belongs to loreserver; it is not
the local working tree used by Branches, Sync, Commit, or other repository
actions. After hosting succeeds, choose one explicit next action: Open
existing, Create local, Connect, or Manage server only. Create/Open
uses a separate client local path selected with the native Browse picker.
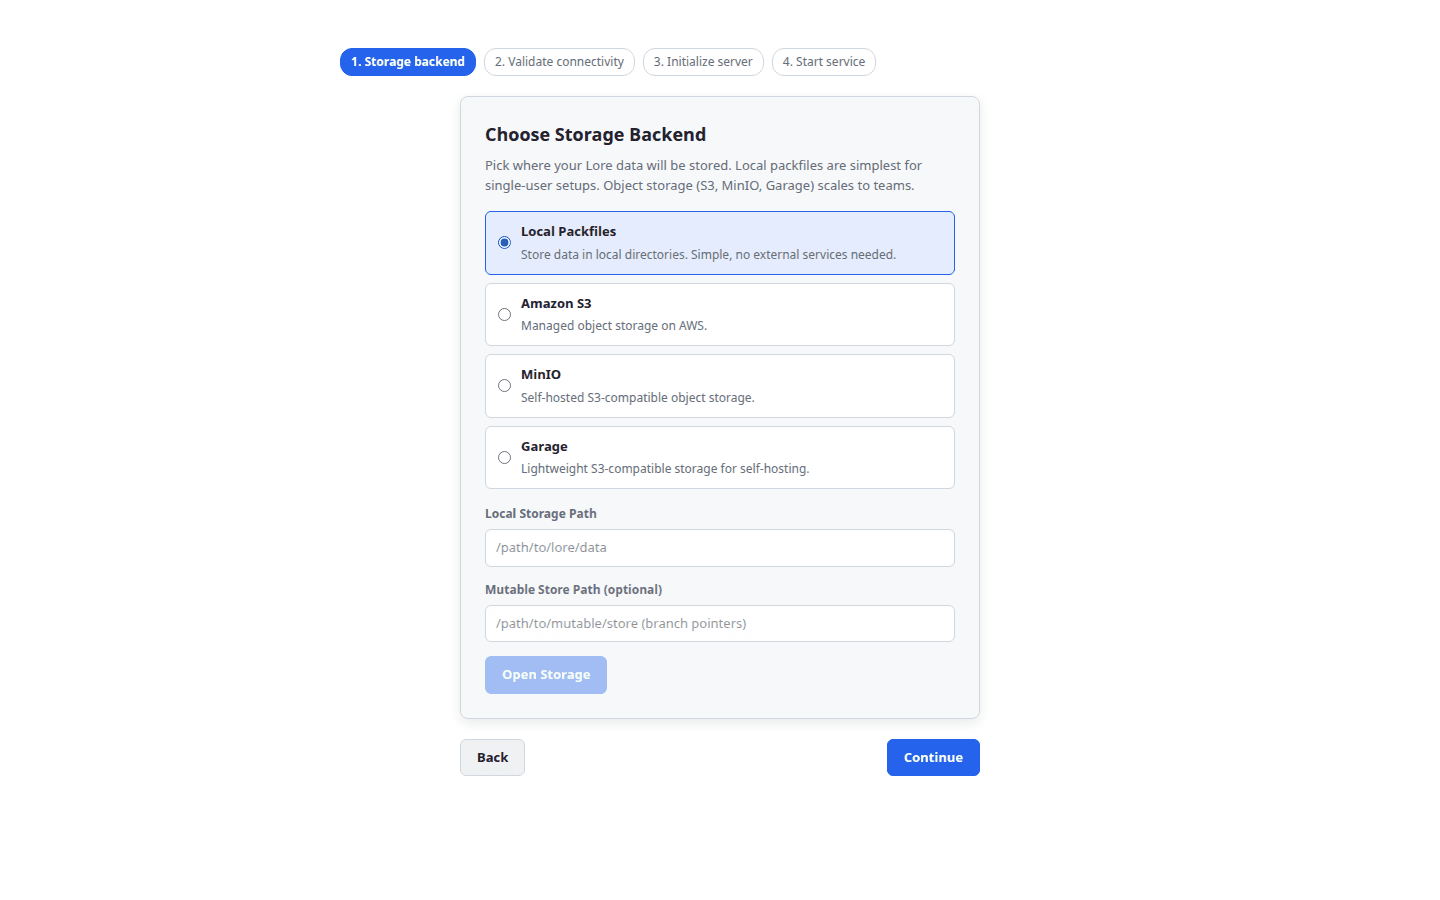
Choosing a storage backend
Content in Lore is content-addressed: data is chunked and hashed with BLAKE3, so identical data is stored exactly once. You bind that storage to a backend:
| Backend | Use for | Configuration |
| --- | --- | --- |
| local | a single workstation or a simple on-disk server | a packfiles path |
| s3 / minio / garage | a shared, networked server | endpoint, bucket, region, access key, secret |
A separate mutable key-value store holds branch pointers. Secret inputs (access keys) are masked in the UI and never logged. See the Storage panel for how to inspect and test a backend after setup.
Configuring the server: Basic vs Expert
The final Host server step is where you start the loreserver. It has two modes, toggled at the top of the card.
Basic mode
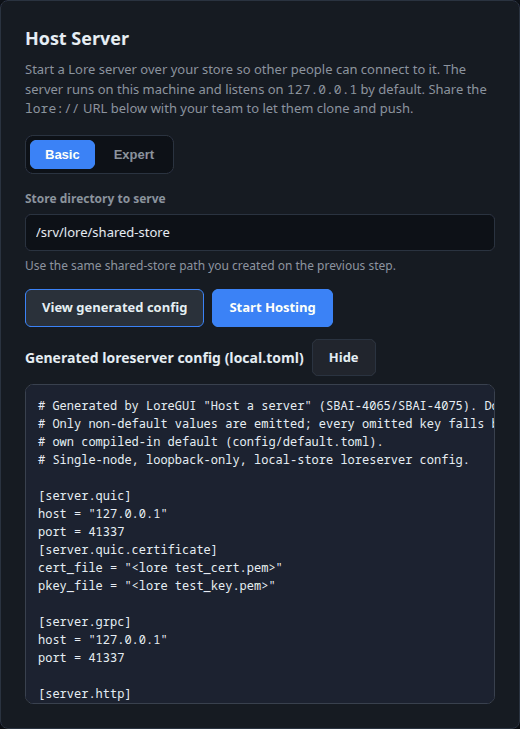
Point at the shared-store path from the previous step and click Start Hosting. That's the whole interaction — LoreGUI generates a minimal, working loreserver config (loopback-only, single node, local store) and launches the server. This is the right default for most teams.
The running-server card keeps the effective name, advertised URL, store path, authentication mode, and process status visible. Authentication: Not required is a valid standalone/no-auth state, not an error. Browse repositories uses that card's advertised URL directly rather than asking you to type it again.
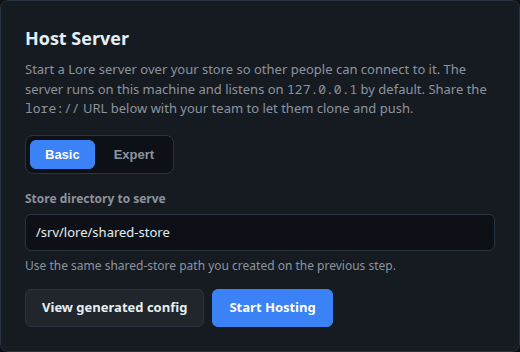
Expert mode
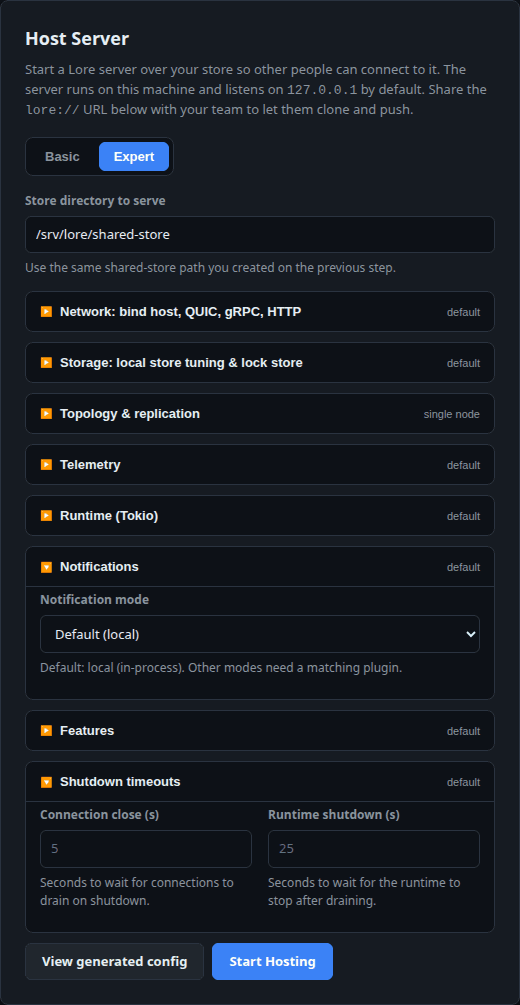
Flip to Expert to reveal the full lore-server configuration surface — 54 fields grouped into collapsible sections. Every field is optional: leave it blank and LoreGUI falls through to lore's own compiled-in default (the placeholder text shows you exactly what that default is). So an untouched Expert form produces the same minimal config Basic mode does.

The sections map directly to lore's server config:
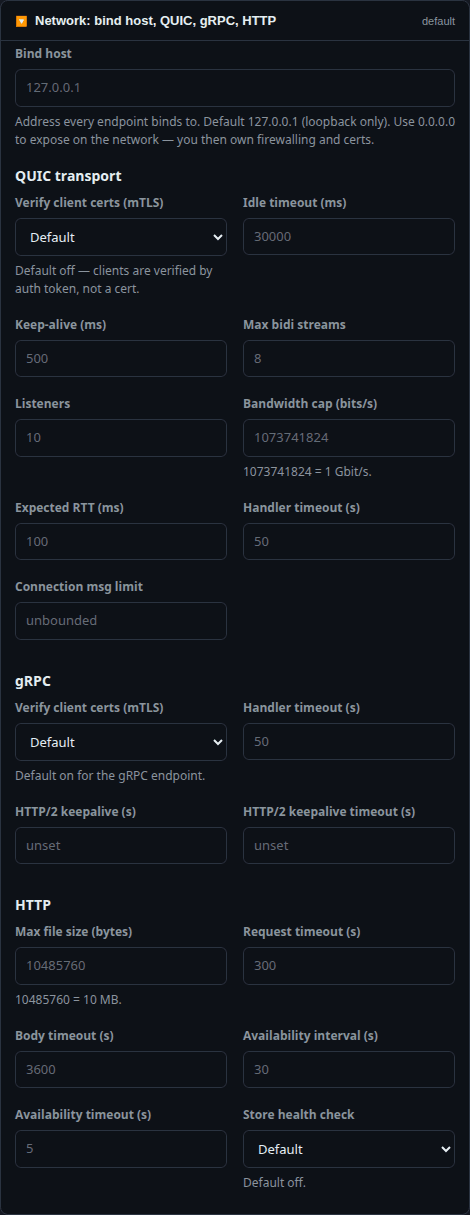
Network — bind host, QUIC, gRPC, HTTP
The bind host (default 127.0.0.1, loopback only — set 0.0.0.0 to expose on the network, where firewalling and certs become your responsibility), plus tuning for all three endpoints: QUIC transport (idle timeout, keep-alive, max bidi streams, listeners, bandwidth cap, expected RTT, handler timeout, connection message limit, mTLS), gRPC (handler timeout, HTTP/2 keepalive, mTLS), and HTTP (max file size, request/body timeouts, availability probe, store health check).
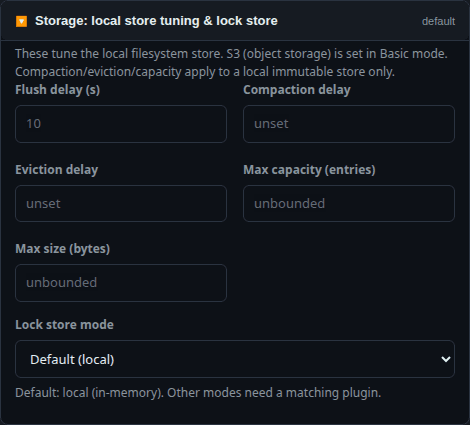
Storage — local store tuning & lock store
Flush/compaction/eviction delays and capacity/size caps for the local immutable store, plus the lock-store mode. (S3 object storage is chosen back in Basic mode's backend picker; these fields tune a local filesystem store.)
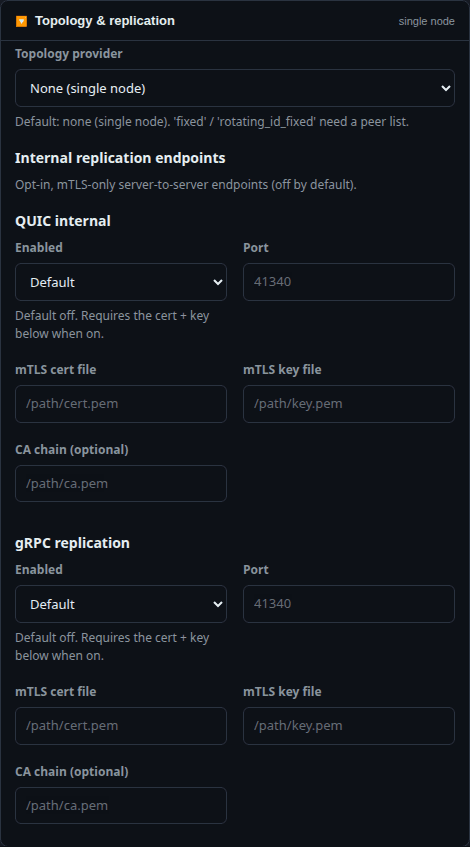
Topology & replication
Run a single node (the default) or a multi-node cluster with a fixed or rotating-ID peer list. Below it, opt-in, mTLS-only internal replication endpoints (QUIC internal and gRPC replication) for server-to-server replication — each with its own port, cert, key and optional CA chain.
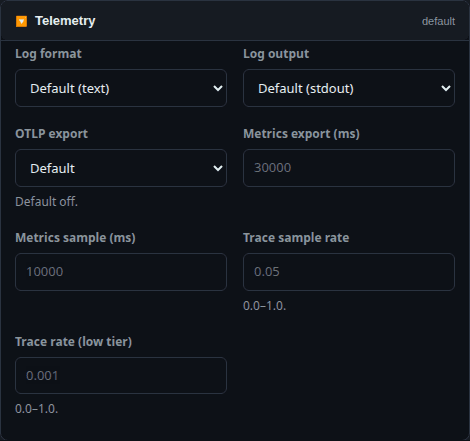
Telemetry, Runtime, Notifications, Features & Timeouts
- Telemetry — log format/output (text/ansi/json, stdout/stderr/file), OTLP export, metrics intervals, trace sample rates.
- Runtime — Tokio worker threads, max blocking threads, thread keep-alive.
- Notifications — notification mode.
- Features — history step size, revision step-key / list-cache acceleration, diff source cap and history-walk concurrency.
- Timeouts — graceful-shutdown connection-close and runtime-shutdown windows.
Inputs are validated inline — out-of-range trace rates, a file log output with no path, an mTLS endpoint enabled with no cert, a peer with no address — so you can't start a server with a config lore would reject.
You never hand-edit the TOML
LoreGUI generates the loreserver config from whatever you set (or left at default) and writes it for you. To see exactly what it will run, click View generated config — in either mode — for a live preview of the local.toml it produces.
In Basic mode that's a tidy, minimal single-node config:
Customise a few Expert fields and the preview reflects them — only non-default values are emitted; every omitted key falls back to lore's compiled-in default:
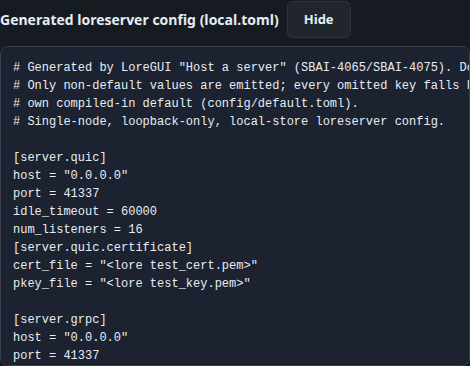
The header on the generated file says it plainly: "Generated by LoreGUI — Do not edit by hand." The config is an output of the GUI, not an input you maintain.
How the running server is wired
With no [server.auth] block the server runs with auth disabled (the local host path), and a client connecting over a lore:// URL (no trailing s) skips server-certificate validation — so the shipped self-signed test cert works with zero client-side trust setup. The advertised URL LoreGUI shows after Start Hosting is exactly the one teammates paste into Connect to a server.
The fully networked path — a QUIC/gRPC Lore server with repository.clone of a lore://host/repo URL and branch.push — runs end-to-end locally with no external infrastructure; the connect → create → commit → push → clone → verify round trip is exercised by the live-server spike in docs/live-server-client-spike.md.
Running
loreserveryourself. Because the config LoreGUI writes is a standardloreserverTOML, you can also run the binary directly with it —LORE_CONFIG_PATH=<dir> LORE_ENV=local loreserver. The in-app Host server flow does this for you; the standalone command is there if you want to manage the process yourself or run it on a headless box.
Next steps
- Inspect and test your backend in the Storage panel.
- Hand teammates the Connect to a server guide.
- Drive maintenance (flush, garbage-collect, verify) from the Manage surface.