Get the most out of LoreGUI.
From first launch to theming, here’s how every surface of LoreGUI works — illustrated with real screenshots of the desktop app.
Getting started
Launch LoreGUI and you land on “Choose Your Setup Mode.” Pick whether you’re joining an existing server or hosting your own — everything else is guided from there. No config files, no CLI bootstrap.


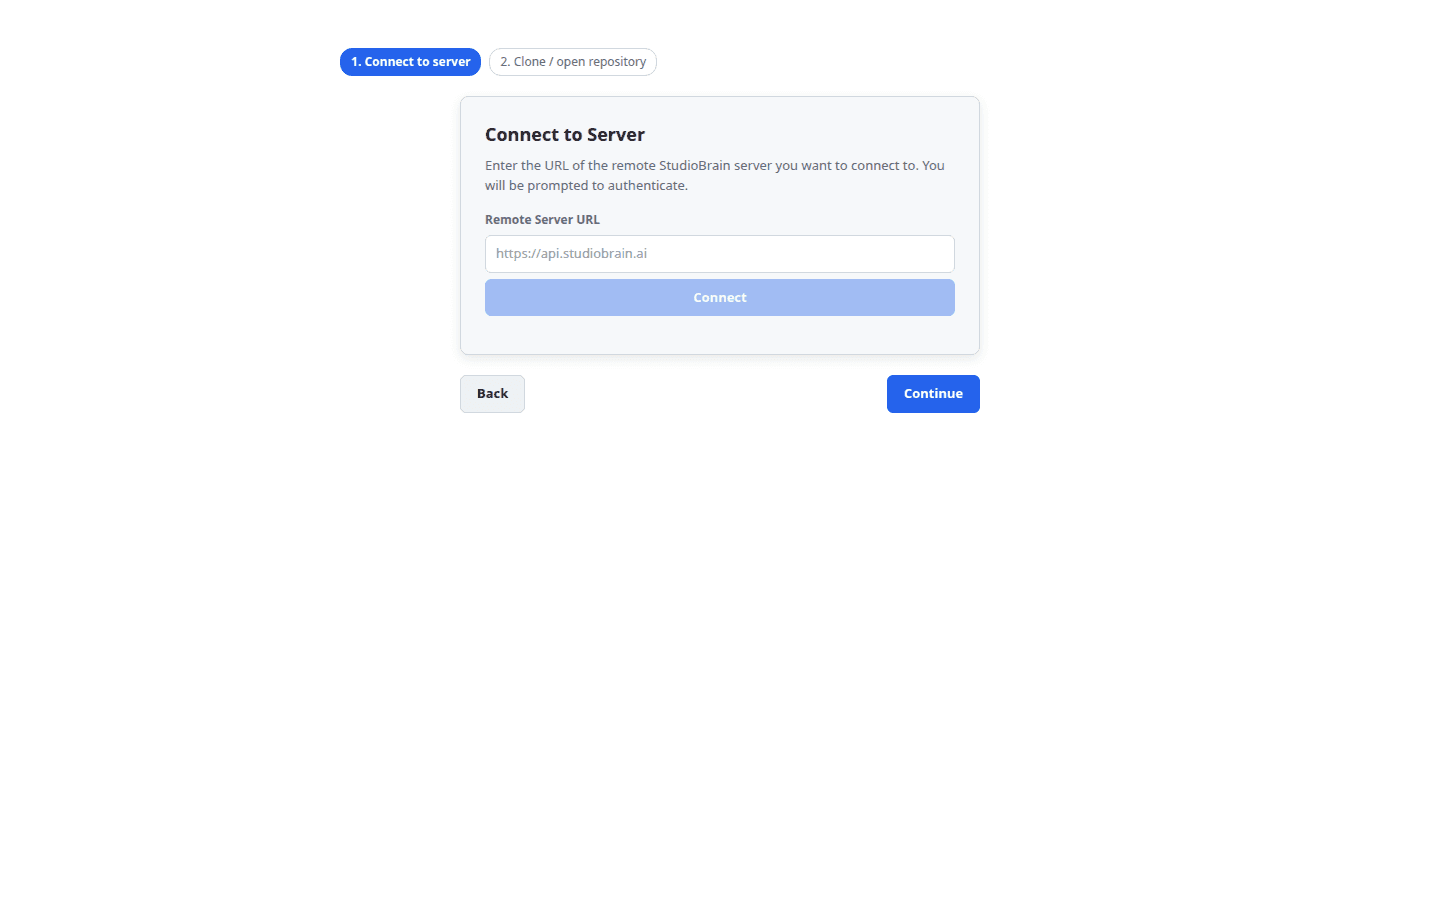
Connect to a server
Joining a team? Point LoreGUI at your server’s address and sign in. It binds the connection in-process and pulls only the files you open — so even a multi-terabyte project is ready in seconds.
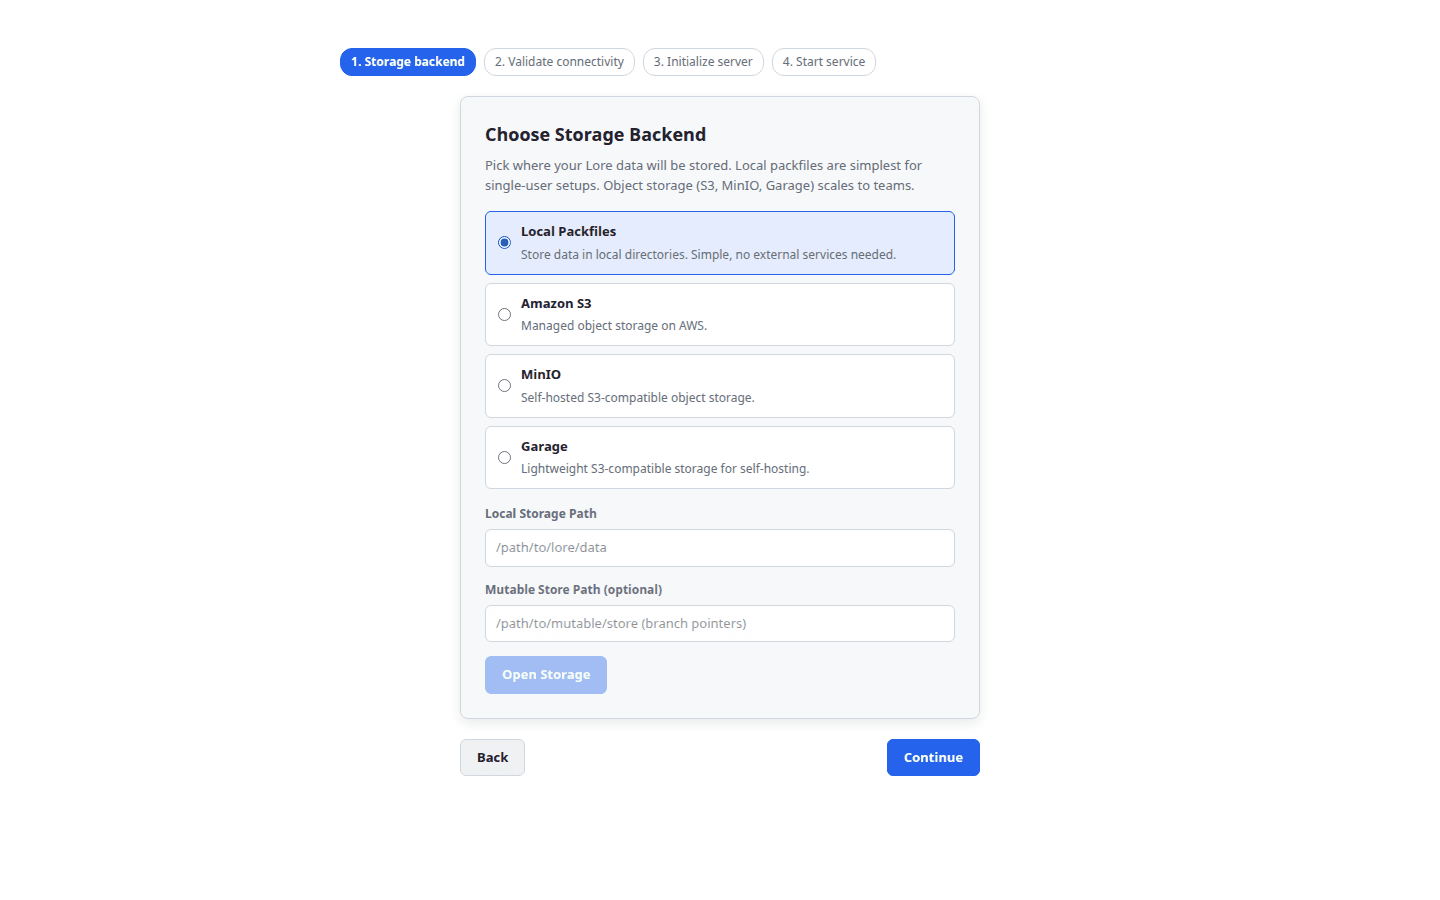
Host a server
Standing up a new repository? Choose a storage backend — local disk, an S3 bucket, or a hosted endpoint — and LoreGUI provisions and serves it. On Windows it can register a service so checkouts stay synced and autorun on boot.
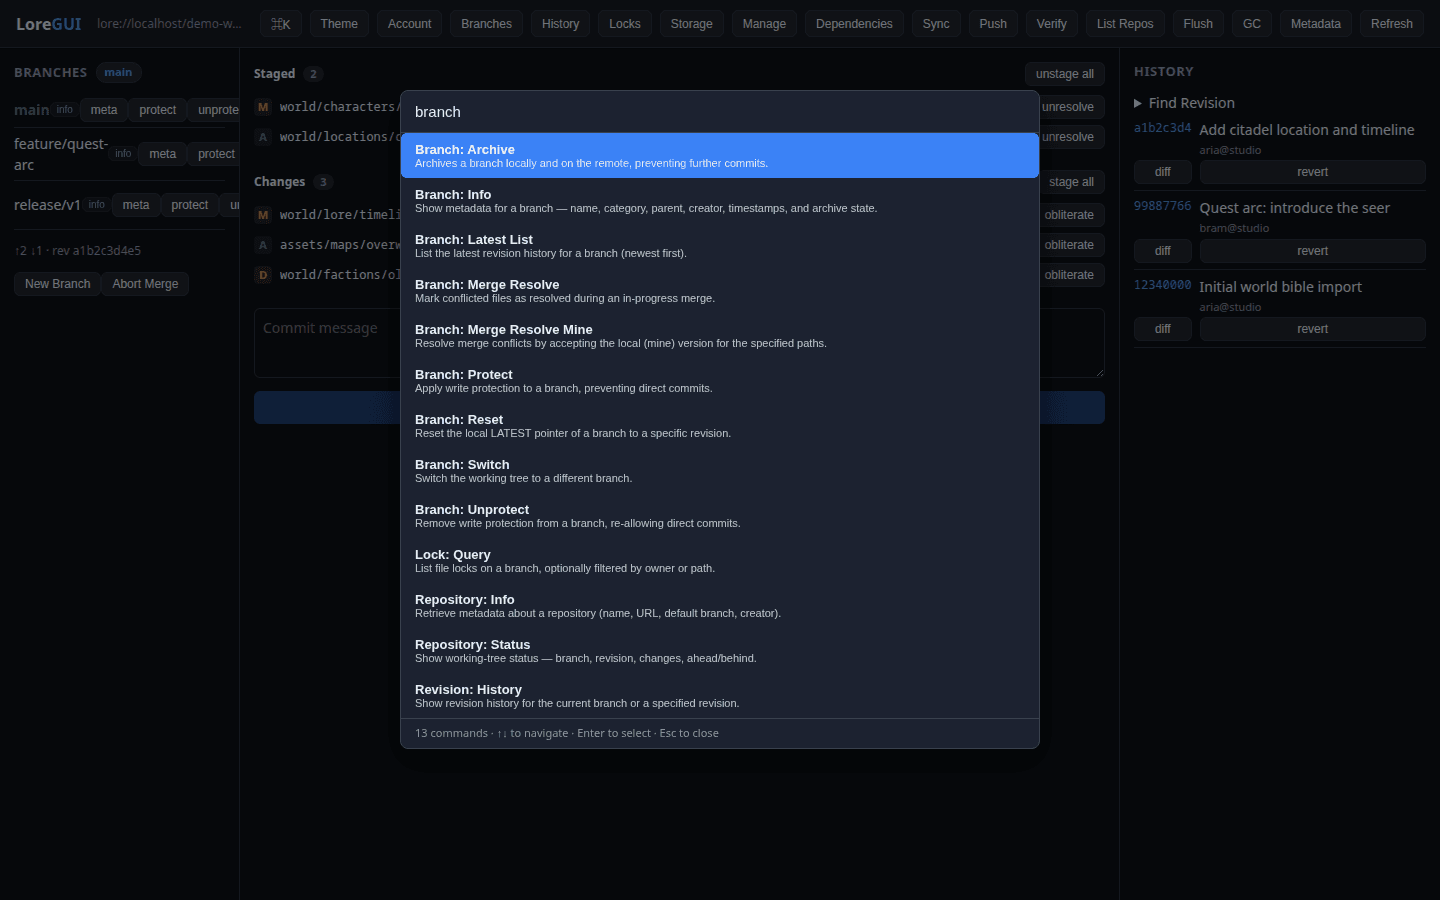
The command palette
Press ⌘K (Ctrl K on Windows and Linux) to open the palette and fuzzy-search every operation in the app — branch, merge, commit, lock, revert and more. It’s the fastest path to any action, and every endpoint LoreGUI exposes lives here.
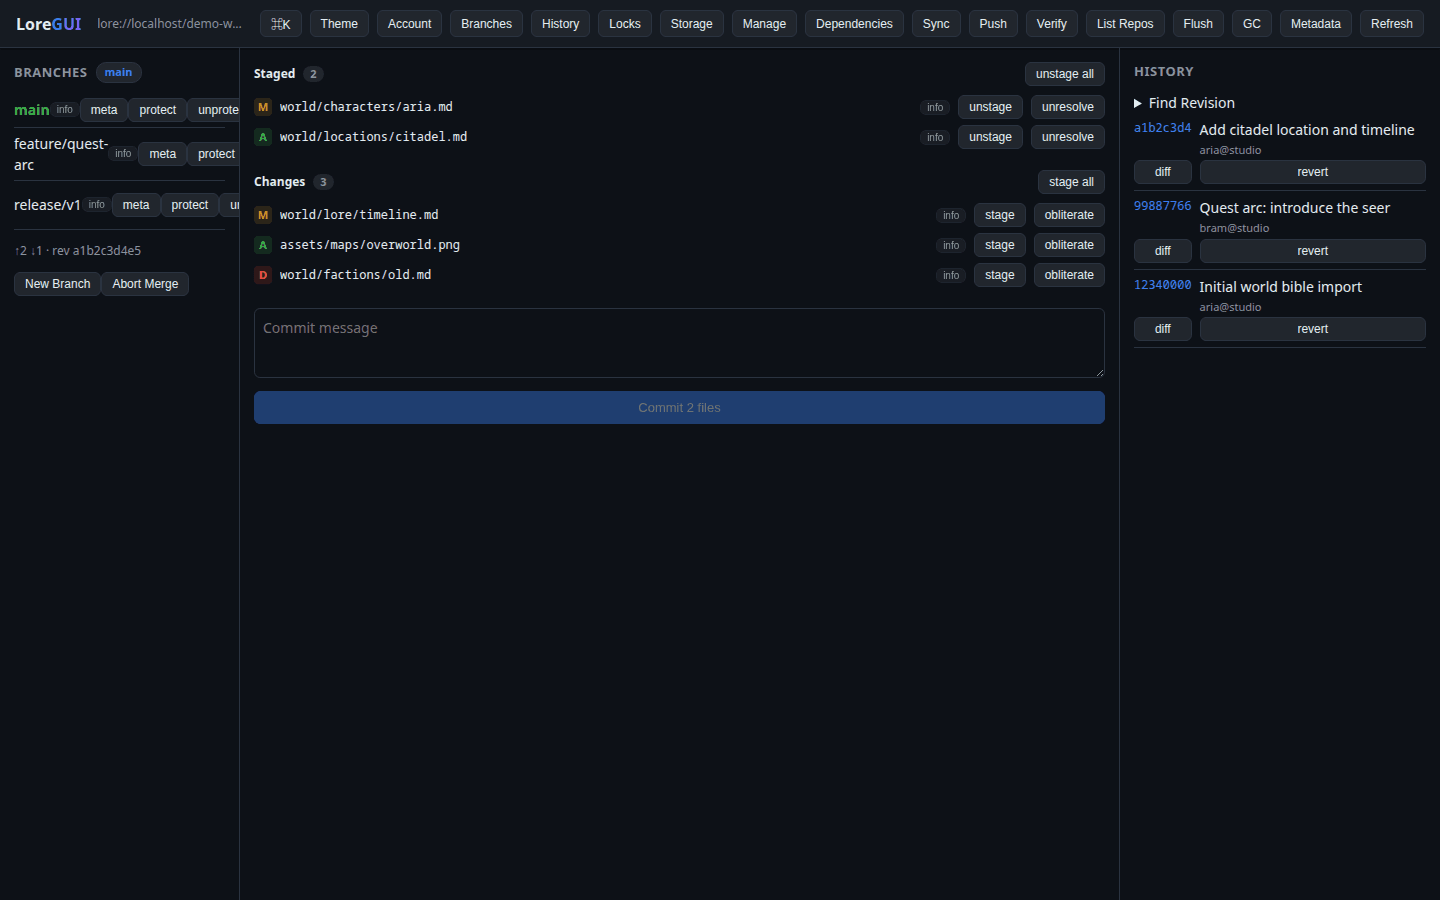
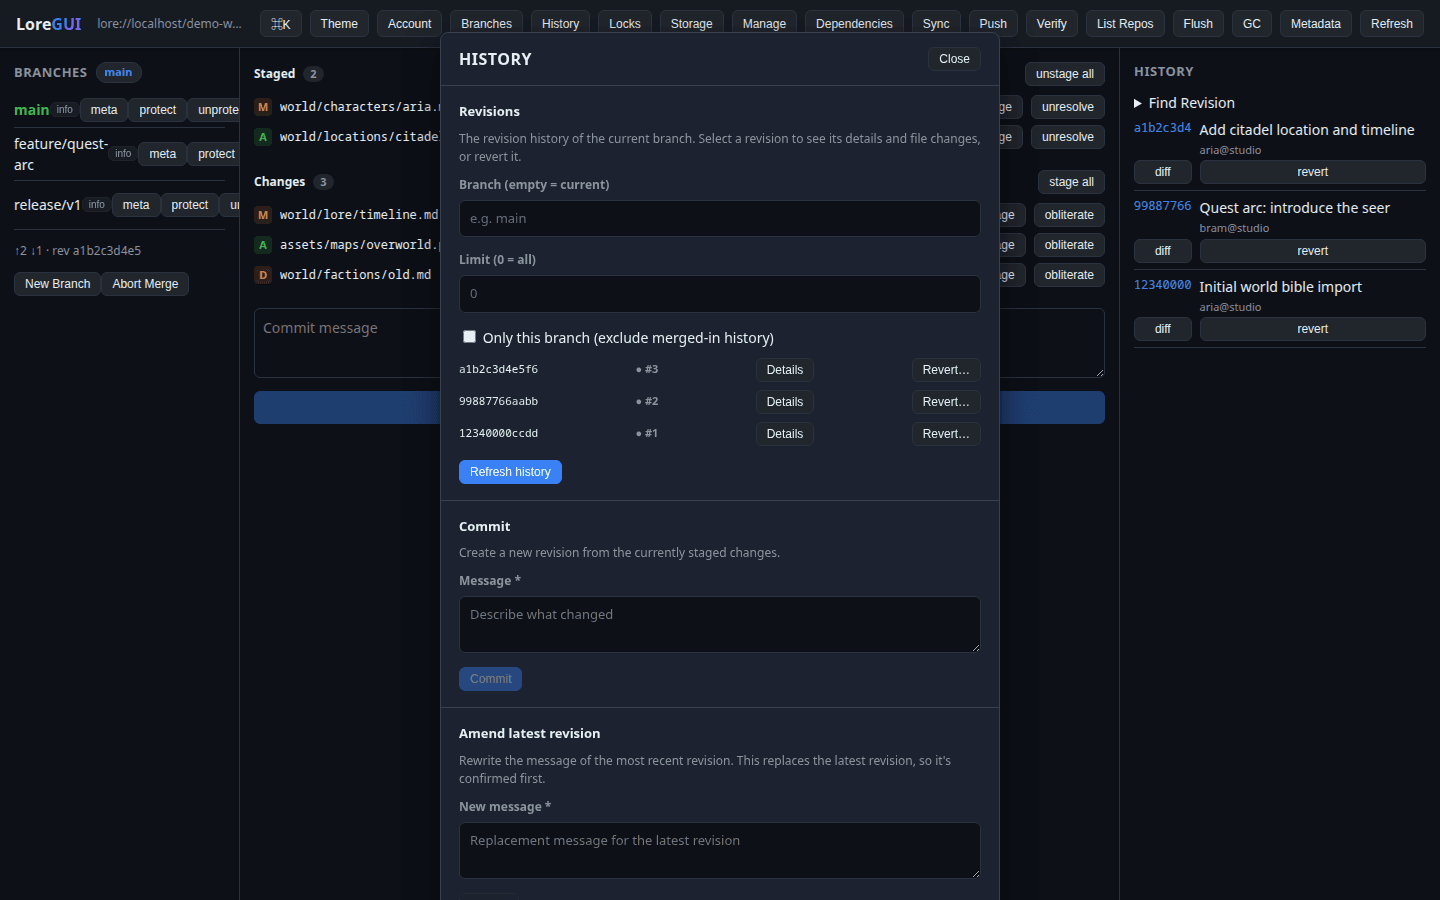
Working with changes & history
The main view puts branches, your staged and unstaged changes, and the revision history side by side. Stage files, write a commit message, and watch the new revision land in history. Open any revision to inspect its diff, cherry-pick it, or revert it.
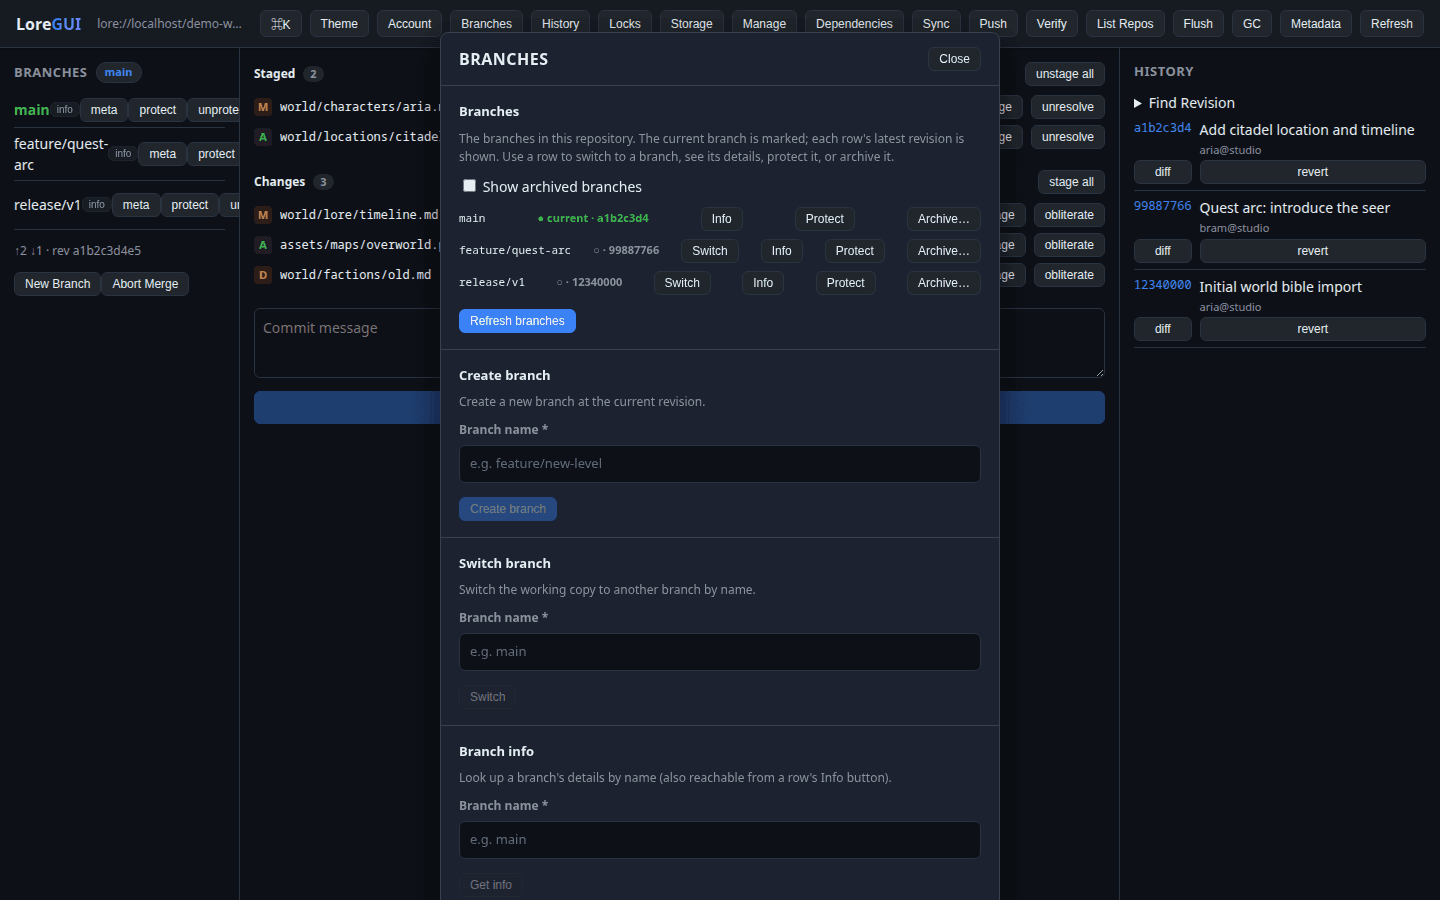
Branches & merging
Create, protect, reset and archive branches from the branches panel. When two branches diverge, LoreGUI walks you through a guided three-way merge — resolve each conflict as mine, theirs, or a manual blend, then finish the merge in one place.
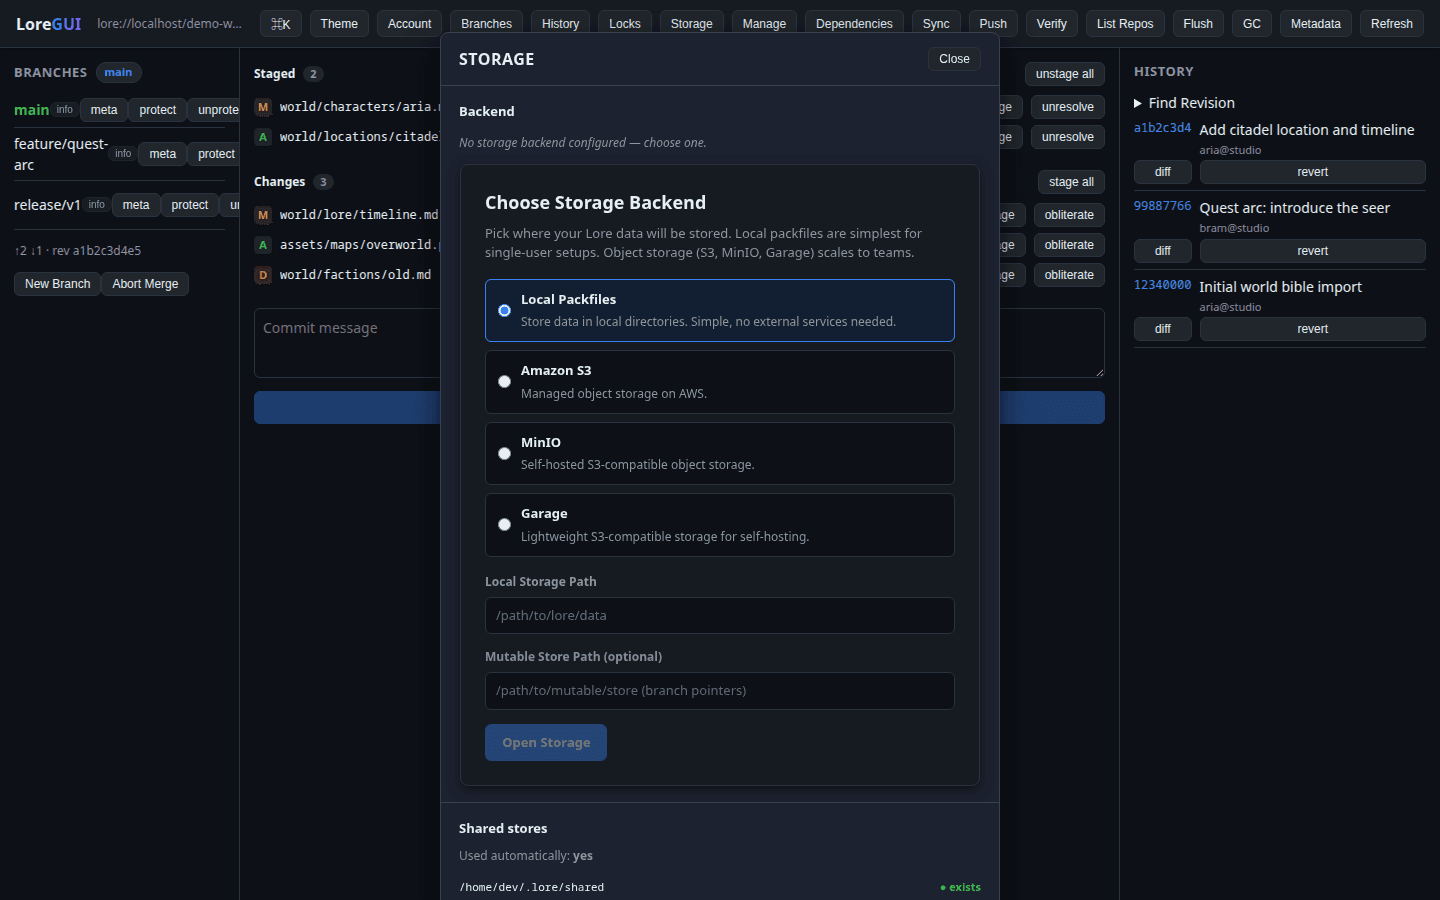
Storage backends
The storage panel shows which backend a repository is bound to and whether it’s reachable. Content is chunked and hashed with BLAKE3, so identical data is stored exactly once — backends stay small and integrity is verifiable down to the chunk.
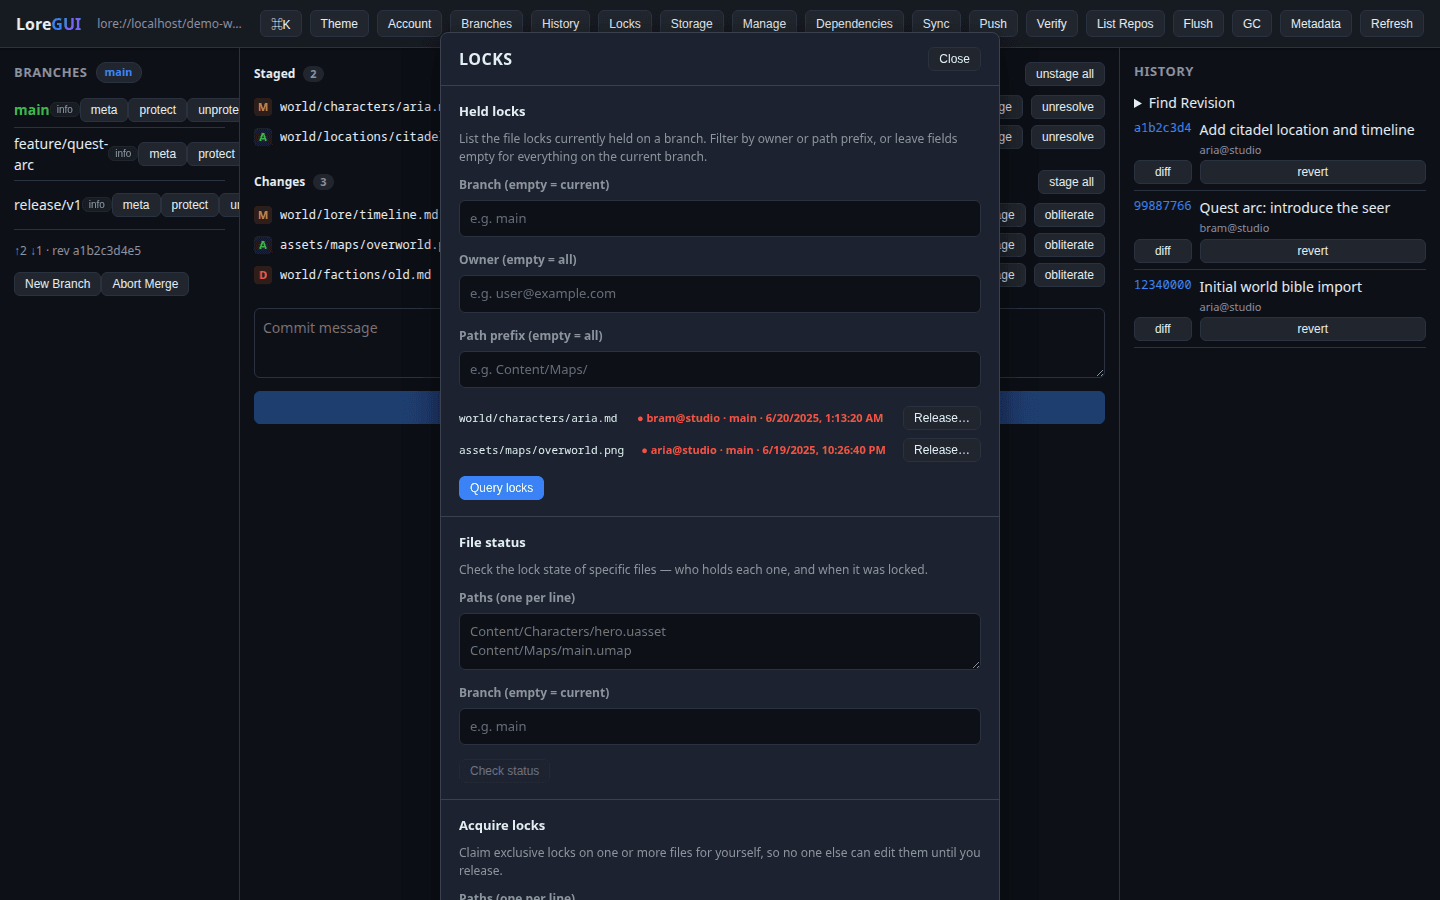
Locks
Binary assets can’t be merged. Claim an exclusive lock before you edit a texture, mesh or audio file, see who holds what in real time, and release it with one click when you’re done.
Dependencies
Track the links between files and the assets they reference. The dependencies panel surfaces what depends on what, so you can change shared assets with confidence and remove links cleanly.

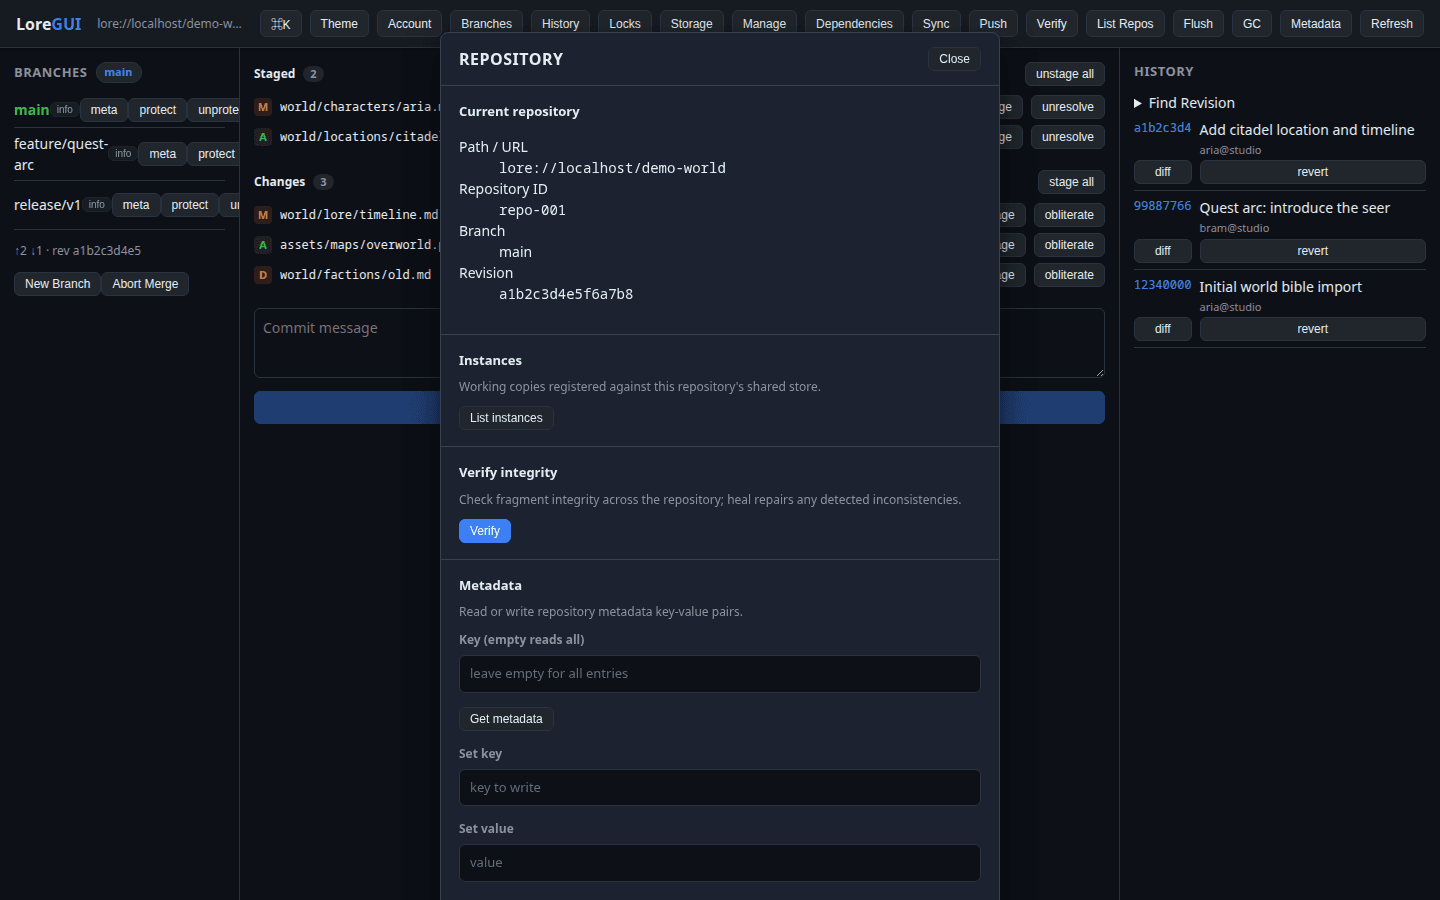
Repository management
Administer the repository itself from the manage panel — create and delete repositories, flush and garbage-collect storage, verify integrity, and set metadata. The maintenance operations that used to live behind CLI flags, made visible.
Account
Review your identity and the server you’re signed in to from the account panel. LoreGUI resolves your user info from the connection, so you always know who you are and where your commits land.

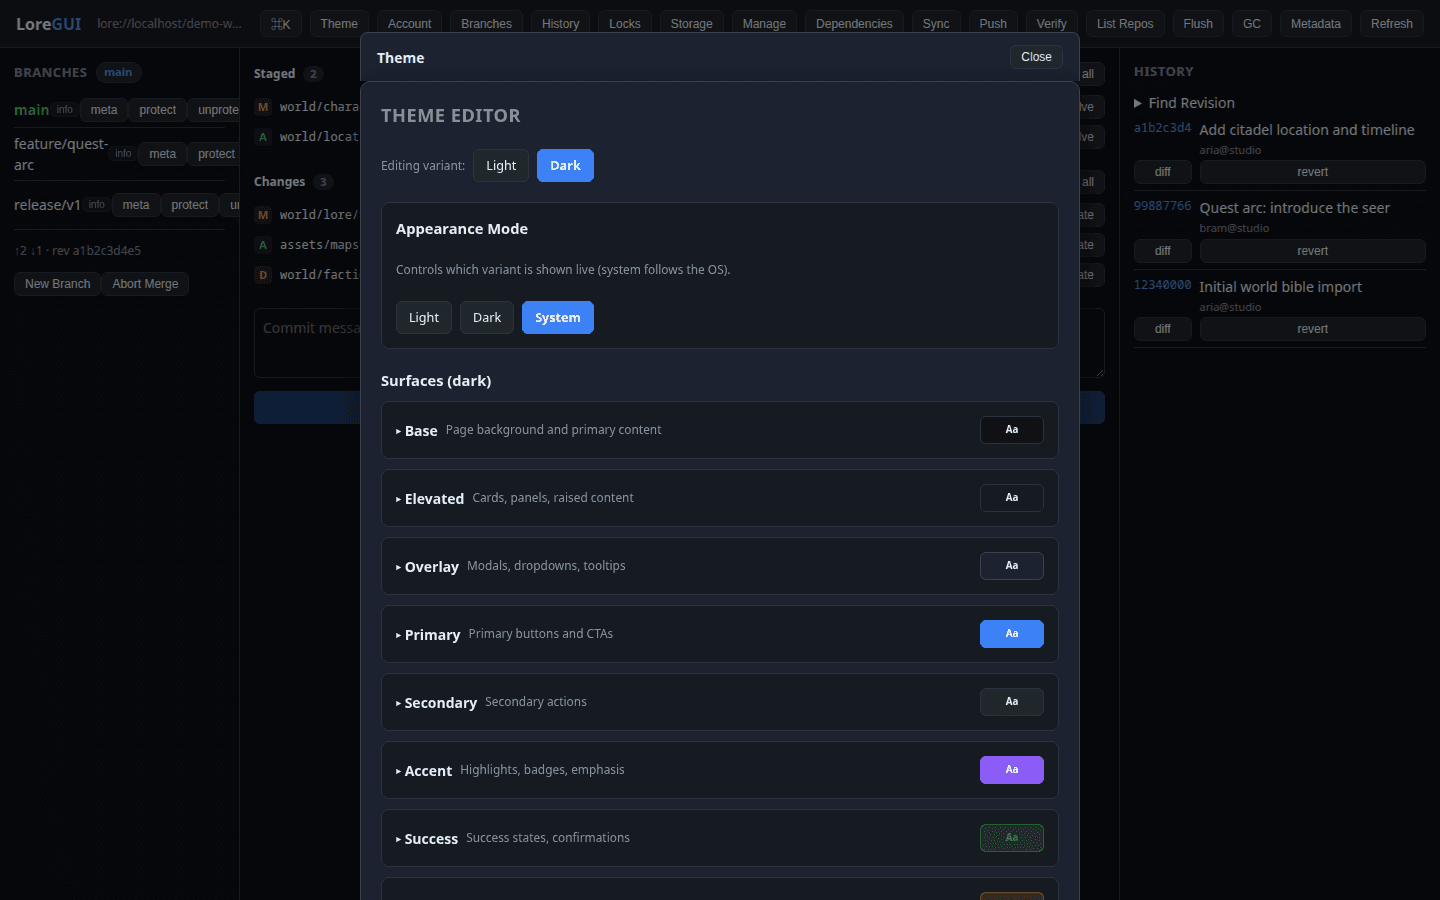
Theming
Every surface in LoreGUI is a semantic token. The theme editor lets you build a palette, save it, and share it — the entire app re-themes instantly. Ship a dark theme for late nights and a light one for the studio, from the same controls.

Drive LoreGUI from AI agents (MCP)
LoreGUI is a toolkit, not just an app. The same in-process lore binding that powers the palette and panels also ships as an MCP server in the repo at lore-mcp/, exposing one tool per lore op — status, history, diff, branches, file-history and locks, plus commit, branch, stage and lock. Register it in your agent (Claude Code and friends) and it drives Epic’s lore VCS the way you drive the GUI. The loregui and lore agent skills let an agent self-onboard and configure it for you.
"lore": { "command": "/path/to/loregui/lore-mcp/venv/bin/python", "args": ["/path/to/loregui/lore-mcp/server.py"], "env": { "LORE_REPO": "/path/to/repo", "LORE_OFFLINE": "1" }}One-time setup: build the JSON CLI with cargo build -p lorevm-cli, then create the lore-mcp/venv and install its requirements. The tool names and schemas are generated from the same command-palette manifests the GUI uses, so the agent and the app stay in lock-step.